Showing posts with label Recipes. Show all posts

Eating for Mental Health

This is part 4 of a 4-part series designed for Bend + Bloom Yoga's May Challenge. Click to read Part 1, Part 2, or Part 3.

Just as the final limbs of yoga highlight the unity of the Self & the Divine, there is a very close link between your gut and your brain. Supporting your gut through proper nutrition can improve general mental health, and may facilitate the mental fortitude necessary to explore these advanced yogic techniques.

Probiotics are "friendly" gut bacteria that help nourish our gastrointestinal tract and protect against the bad bacteria that comes from excess consumption of sugar, processed foods, alcohol, or medications. Probiotics are found in naturally fermented foods like real pickles, kimchi, kombucha, or real sauerkraut (not the fake stuff with vinegar).


Homemade Sauerkraut
1 head green cabbage
1.5 T. salt
1 T. pickling spices (optional)
Large glass jar
A weight that fits inside your glass jar (e.g., a smaller jar filled with pie weights)
Cheesecloth & rubber band

Chop cabbage into thin slices. Mix the cabbage and salt together in a big mixing bowl and massage it together with your hands until it wilts & gets juicy, about 5 minutes. Fold in optional pickling spices and transfer cabbage (and its juices) to a large glass container, pushing it down as you go. Place a weight on top of the cabbage. Place cheesecloth over the mouth of the glass container and secure it with a rubber band.

Over the next 24 hours, press down on the weight every so often until you end up with a layer of liquid on top of the cabbage, completely submerging it.

Keep the cabbage on a countertop away from direct sunlight. After 5 days, taste the sauerkraut. You’ll know when it’s done by how it tastes - it could take 10 days or more. Once it’s done, pop a lid on the glass container and transfer it to the fridge.

Hungry for more? 
or 

Awareness in Eating

This is part 3 of a 4-part series about healthy eating as it relates to yogic principles, designed for Bend + Bloom Yoga's May Challenge. Click to read Part 1, Part 2, or Part 4.

When it comes to eating, hunger can derail the best of intentions. Who hasn’t made a 3-o’clock trip to the office cookie jar after skipping lunch? That’s because when your blood sugar is low, your cells send a message to your brain that they need fuel - and quick. This translates to a primal craving for simple carbohydrates like sugar … and a biochemical response that makes willpower and mindful eating nearly impossible.

Snacking is the secret weapon that will help you stay on track and maintain awareness in all your eating choices. It sounds counterintuitive: eat more, weigh less. But it works because you end up making better decisions (read: you’re more aware) when you aren’t famished.

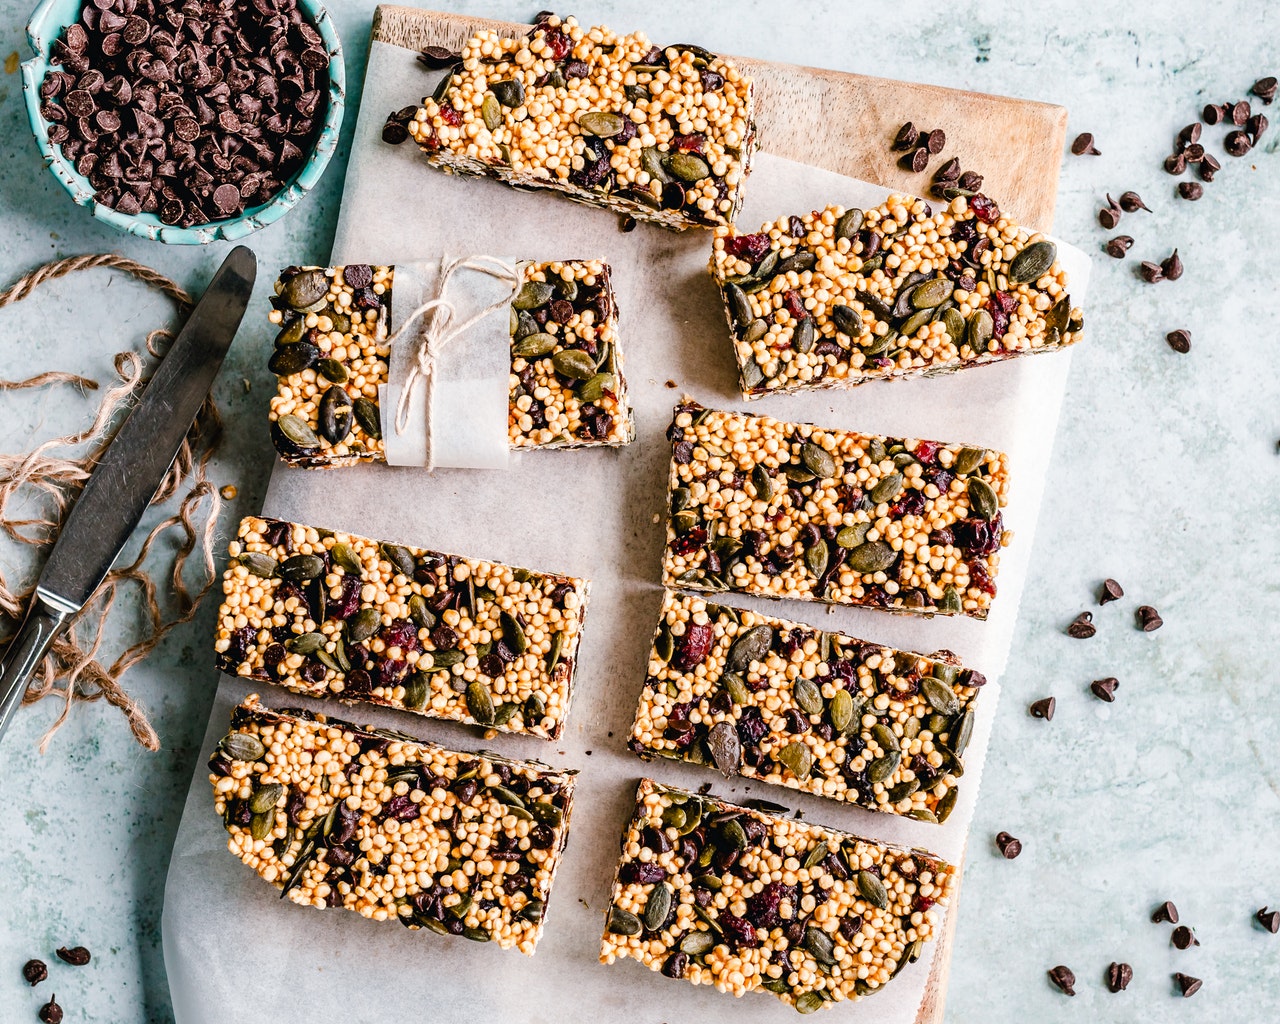
Of course, snacks have to be healthy to be helpful. This week’s recipe provides complex carbohydrates to satisfy your cells, but also offers plant protein and healthy fats that will keep you satiated for longer.

Plus, these things are delicious! Enjoy your third week of the May Challenge, and have fun testing your ability to maintain mindfulness on the mat and off.

Homemade Snack Bars

2 c. nuts your choice (almonds and cashews work well)
1 c. dried fruit of your choice (I like apricots but feel free to get creative!)
½ t. Spice of your choice (optional, but I love cinnamon and allspice)
2 T. coconut oil, melted (more or less depending on your nut choices)

Place first three ingredients in a food processor and pulse until pulverized. With the food processor running, slowly add as much coconut oil as you need to make the mixture congeal into a batter-like consistency. Roll out batter to ½” thick on a silpat or other flat surface. Use a pizza cutter to slice into bar shapes. Carefully wrap bars in parchment or wax paper and put in the refrigerator until they’re set. Enjoy!

Hungry for more? 
or 

Eating for Respiratory Health

This is part 2 of a 4-part series about healthy eating as it relates to yogic principles, designed for Bend + Bloom Yoga's annual May Challenge. Click to read Part 1Part 3, or Part 4.

You’ll be breathing a lot this week, so take good care of your lungs! Here’s how:
  1. Take a deep breath before you eat: this shifts your nervous system into a parasympathetic state ("rest & digest"), crucial for optimal digestion. Yep, that's right: your lungs help you digest!
  2. Pump some iron: Iron is essential for transferring oxygen in your blood from the lungs to the tissues and storing oxygen. Spinach is a great plant source of iron.
  3. Stop the sneeze: Just like pollen, allergenic foods can have respiratory effects. The Big 8 allergens are wheat, dairy, corn, fish, shellfish, tree nuts, peanuts, and soy. In addition, inflammation from eating foods like refined carbohydrates (flour, sugar) and alcohol can negatively impact lung health.
  4. Add antioxidants: counter the oxidative effects of air pollution and smoke by consuming antioxidant-rich foods like fruits, veggies, nuts, and seeds.
Support your lung health with this antioxidant-rich, hypoallergenic smoothie bowl.


Smoothie Bowl

It’s amazing what you can throw into a smoothie! I like to add whatever I have lying around that may not get used otherwise: carrots, ½ avocado, ½ apple, nut milk, nutritional yeast, seaweed flakes… the list goes on!
½ c. filtered water
½ banana or mango
½ c. frozen organic berries
Big handful organic spinach (baby spinach is OK too!)
Small handful nuts of your choice (omit if
1 T. chia seeds
Top with shredded coconut, toasted pumpkin seeds, sunflower seeds, or nut butter

Place water into blender. Add next 5 ingredients and puree to desired consistency, about 15-30 seconds. Pour into a bowl, add toppings, and enjoy!


Hungry for more? 
or 

Sources:
https://www.ucsfhealth.org/education/hemoglobin_and_functions_of_iron/
http://www.whfoods.com/genpage.php?tname=nutrient&dbid=70

Nutrition for Inner Strength

This is part 1 of a 4-part series about healthy eating as it relates to yogic principles, designed for Bend + Bloom Yoga's May Challenge. Click to read Part 2, Part 3, and Part 4.

What we eat directly affects how we feel mentally, emotionally, and physically. Proper nutrition can strengthen our bodies and minds.

On a physical level, protein is responsible for building muscle. It is also a slow-burning energy source, which means that eating protein helps us feel satiated for a long time. Hunger can derail health, and protein is one of our best defenses against it.

Animal foods are the best source of protein because they are complete (meaning they contain all of the essential amino acids), but we must take care when choosing animal foods due to health, ethical, and environmental concerns. Pastured eggs are sustainably farmed and provide optimal health because hens roam free and graze on natural feed. The nutritional benefits are obvious in the orange color and robustness of the yolks, which are rounder and more orange than factory-farmed eggs, signifying a higher beta-carotene content and an overall healthier egg.

Starting your day with an egg breakfast is an excellent way to stabilize blood sugar, prevent hunger, and give your body the protein it needs for inner and outer strength. This easy recipe takes just a few minutes to prepare and can be adapted based on what you have on hand.


Easy Egg Breakfast
The simplest way to enjoy this breakfast is to follow the below recipe as-is, but it’s also super-easy to jazz up and enjoy for lunch or dinner, too. Serve over ¼ cup of rice, beans, lentils, grains, or a sprouted organic corn tortilla. Fake a shakshuka by placing eggs over warm crushed tomatoes. Top with Sriracha, hot sauce, a sliced avocado, sprouts, chives/scallions, paprika, microgreens, and/or toasted sesame seeds. Pair with pastured bacon on the weekends. #putaneggonit! You can pair this with almost anything - be creative!

Extra-virgin olive oil, more if needed
Pastured butter
2-3 pastured eggs (organic or free-range are good too if you can’t find pastured)
Handful of organic dark green leafy vegetable like kale, chopped as needed (I get boxed baby kale for easy grabbing - no chopping necessary)
Salt & pepper

First, heat a skillet over medium-high heat. Once the pan is hot (about 1 minute), turn the heat down to just over medium, and melt a few swirls of olive oil with a pat of butter. Once the butter is fully melted, gently crack the eggs directly into the pan. Cook for 1 minute and move to the side of the pan so you can add the greens to the pan (you may need to add a bit more olive oil). Cook until greens have wilted, about another minute or so. At this point I flip the eggs and turn off the heat, cooking them just until the whites are set. Season with salt & pepper, transfer to a plate, and serve immediately.

Sources: http://www.ncbi.nlm.nih.gov/pubmed/20048505
Hungry for more? 
or 

Soft Tacos for Breakfast, Lunch & Dinner!

One of the things I miss most about California is the Mexican food. With the snowstorm approaching,
I headed to the store to stock up on groceries and decided on a nostalgic treat. These veggie soft tacos turned out better than anything I've had in NY yet, and we even adapted the recipe for breakfast tacos the next morning (recipes below).


Veggie Soft Tacos

Corn tortillas
Cotija cheese
1-2 cans pinto beans (I like Eden Organics because their cans are BPA-free)
1 t. chili powder
1 t. cumin
Salsa (I like Muir Glen Organics' Medium Salsa)
Avocado, sliced
Cilantro, chopped
Olive oil & butter

Grate as much cotija as you'll need (about 2 T. per taco).

Heat olive oil & butter in a large skillet over medium-high heat, and add the chili powder and ground cumin. Cook the spices until fragrant, about 30 seconds, then stir in the beans. Mix and cook until heated through. Remove from heat.

Heat 2 tortillas (or as many as you can fit) in a dry skillet on medium-high. Cook until slightly toasted. Flip the tortillas and sprinkle 1 T. of cotija on each. When the cheese on the tortillas has melted, spoon 1-2 T. of salsa on top of each.

Once salsa is barely heated through, remove tortillas from the pan and top with beans, remaining 1 T. cotija, avocado, and cilantro.

Breakfast Soft Tacos

Corn tortillas
Cotija cheese
Pastured, cage-free eggs
Salsa
Avocado, sliced
Cilantro, chopped
Olive oil & butter

Grate as much cotija as you'll need (about 2 T. per taco). Gently whisk eggs (2 per person) together in a bowl.

Place two pans on the stove. In one pan, heat a mixture of olive oil & butter (about 1 T. each) over medium heat. Add the egg mixture to this pan. When the edges of the egg mixture are slightly set, gently scramble them once. Keep an eye on the eggs and continue to gently scramble as necessary.

In the other pan, add 2 (or as many as you can fit) corn tortillas. Cook until slightly toasted. Flip the tortillas and place 1 T. of cotija on each. When the cheese on the tortillas has melted, spoon 1-2 T. of salsa on top of each.

Once salsa is barely heated through, remove tortillas from the pan and top with eggs, remaining 1 T. cotija, avocado, and cilantro.

Hungry for more? 
or 

Kale, White Bean & Brown Rice Bowl

As most of you know by now, I'm mildly obsessed with 101cookbooks.com. Every recipe is delicious, and the presentation is documented so artistically - I just love it.

Most of her recipes are pretty easy, but I usually either try to figure out ways to simplify them further.

This is an example of one of her pretty easy recipes made even easier. Another thing I love to do whenever possible is make things in bulk and then dress up the leftovers - this is a perfect recipe for that.

Kale, White Bean, and Brown Rice Bowl
Inspired by 101Cookbooks' Kale Rice Bowl recipe
4 c. cooked brown rice (I love the frying pan method - cuts cooking time in half!)
1 can white cannelini beans, rinsed (I like Eden Organics - their cans are BPA-free)
1 bunch organic lacinato/dino kale, washed & chopped
4 pastured eggs
raw sheep- or goat-milk feta
extra-virgin olive oil
jalapeno flakes
Heat large skillet over medium-high heat. Add a generous pour of olive oil - enough to coat the pan. Add beans and saute until lightly browned. Add kale and stir until bright and wilted. Transfer kale & bean mixture to bowl. Add rice and stir to combine. Crumble feta into the mixture and stir to combine.

In a small pan, heat about 2 inches of filtered water until steaming but not bubbly. Carefully crack an egg into a ramekin and gently pour into the hot water. Repeat with remaining eggs. Cook for a few minutes - when whites are set, poach another minute or so and remove eggs with a slotted spoon.

Divide rice mixture onto 4 plates and drizzle with olive oil. Top each portion with a poached egg and sprinkle with jalapeno flakes. Mangia!

Hungry for more? 
Join our mailing list or 
work with me!

Smoothies for Everyone!

My first green smoothie of the week … yummmm!
I just finished participating in the Transformational Nutrition Summit, and after a few days of nerding out, here was my big takeaway:

Drink smoothies.

I'm not kidding! Sometimes it's just that easy.

As many of you know, I already feature smoothies in most of my menu plans, but in the craziness of our move to New York, I had gotten away from drinking them lately.

Have you ever noticed that reminders seem to come at exactly the right time?

We have been busy making friends in our new hometown. Saturday we went out for cocktails with some new friends who also happen to be 10 years our junior. Needless to say, I woke up on Sunday in the mood to detox!

The Summit lecture I watched that day (from the couch!) touched on the concept of switching to green smoothies for breakfast, and how that small change can reduce all sorts of health hazards.

It's important to note that they were talking about smoothies, not juices. While juices contain many of the same nutritional benefits, they are missing one important ingredient: fiber. Fiber is what slows down the absorption of sugar into the bloodstream, which is important for preventing blood sugar spikes (and potentially, gestational diabetes and other blood-sugar-related health issues).

Depending on what you put in them, green smoothies are excellent detoxifiers. They can also be quite nutrient-dense. This makes them a great choice for reproductive health and pregnancy!

Plus, they're super-easy to make. To start, you want about 60% fruit and 40% veggies. What you decide to put in it is up to you, but spinach and romaine are excellent starter veggies because they are less flavorful and more easily blended than some hardier greens.

Here's a recipe I recommend:

Green Smoothie

1/2 c. filtered water - hydrating, nontoxic
2 big handfuls spinach - rich in bioavailable folate
1/2 organic apple - antioxidants galore! Great for protecting your reproductive cells (and your hubby's!) and reducing the risk of miscarriage
1/2 banana - makes for a creamy base, rich in potassium
1/2 c. frozen berries - strong antioxidant properties
2 T. chia seed - rich in omega-3 fatty acids
10-15 walnuts - another plant source of omega-3 fatty acids, as well as protein
1/3 cucumber - natural source of Vitamin K (Vitamin D's partner-in-crime) and a bounty of antioxidants
2 T. cilantro or parsley - super detoxifying
1-2 "coins" ginger & turmeric root (slice off a couple of pieces)
1 T. coconut oil - healthy fat, good for your hormones
1/2 avocado - rich in Vitamins E (powerful antioxidant that reduces the risk of miscarriage) and B5 (essential for reproduction)
1 t. cinnamon - warming, aids in blood sugar control
1 t. nutritional yeast - B-vitamin bounty and protein-rich
Optional power boost: dump a tablespoon of the juice from naturally fermented sauerkraut or pickles into the smoothie for some probiotic punch!

Pour water into blender (I love my Vitamix). Add other ingredients and blend to a smoothie consistency. Serve!  Drink slowly and mindfully.


You can see how easy it is to just keep adding yummy stuff to your smoothie. Experiment and see what you come up with using the 60/40 formula above and adding in fresh herbs, spices and "boosters" to increase its nutritional value. I'd love to hear about what your favorite combination is - tell me on the Facebook page!

A note for women suffering from hypothyroid: Most raw leafy greens are goitrogens, that is, they block thyroid function. If you are hypothyroid, you can avoid this effect by steaming or sautéing your greens before adding them. They will lose some of their nutritional value in cooking (mostly Vitamins C and B, including folate), but much of it will remain, including important minerals like iron.


Hungry for more? 

My baby has arrived!

No, not a real baby (yet) - my first online self-study program! Yes, it's true: Priming the Bump: A 14-Day Fertility Prep Program is finally here!

This Fertility Prep program helps you boost your fertility naturally & improve your baby's chances of being born healthy & smart - without spending a fortune or risking dangerous side effects. It nourishes your reproductive system with fertility-enhancing foods while cleansing your body of toxic substances that could prevent you from conceiving (or lead to birth defects & developmental disorders like autism).

I'm so excited about this new addition to my services. One of my personal goals is to provide health counseling to everyone who needs it, but not everyone can afford my one-on-one coaching rates. That's why the Prep Program is so awesome - you get all the juicy goodness of working with me 1:1, but at a much lower out-of-pocket cost. And I'm offering it at a special introductory rate for a limited time. There's no better time to join in the fertility-boosting fun!

Here's what people are saying about Priming the Bump's 14-Day Fertility Prep Program:

"This is all excellent material and a well thought-out program."

"I'm really enjoying the daily emails, they're informative, yet simple and concise. Love!"

"There is so much good stuff here! Excellent flow of materials and info."

"This is awesome and so informative!"

Want to learn more? Head on over to the Priming the Bump page to check out all the details. And tell your friends & family, because this introductory rate won't last forever.

Get ready to prime YOUR bump!

How to Prep & Store Beans, Nuts & Seeds

Photo by Isaac Wedin
The life cycle of a nut, seed or legume is to be eaten by a bird and eliminated with the bird's natural fertilizers in order to re-grow. In order to survive an animal's digestive tract, most nuts & seeds contain enzyme inhibitors that prevent absorption. The only problem with this is that we can't get the full nutrition benefits from nuts & seeds unless these enzyme inhibitors have been deactivated. 

Since beans contain lots of natural folate, and nuts & seeds have many fertility-enhancing minerals, I frequently recommend that my clients add these healthy foods to their diets. Traditional cultures soaked beans, nuts & seeds in order to improve the digestion & assimilation of their reproduction-supporting nutrients. Here's how.

Beans
I recommend buying dried beans. This is because
most commercial cans contain a BPA lining. BPA, or Bisphenol A, is a man-made compound that exhibits estrogen-like properties upon assimilation into the human body (it is one of many chemicals therefore known as a xeno-estrogen). While the FDA hasn't banned BPA yet, many studies have shown its potential dangers - including a strong link to infertility.

To cook dried beans, first you'll need to soak them. Cover them with lots of filtered water (they will expand quite a bit) and place them in the refrigerator to prevent fermentation. Let them soak overnight or for 12 hours. For extra credit & nutritional punch, you can even sprout legumes (Google "how to sprout beans" and you'll find scores of super-easy DIY tutorials). Regardless of whether you simply soak or attempt to sprout, you'll need to rinse & drain the beans before cooking them. Place the beans in a large pot and cover them with several inches of water. Bring to a boil, then reduce to a simmer. Don't add salt until after the beans are cooked - this will help them retain their shape & texture. Cook the beans for 60-90 minutes or until they become tender (but not mushy). Once they're cooked, drain them again.

At this point, you can either use the beans in a recipe or store them. If you're going to use them within a few days, you can simply store them in an airtight container in the refrigerator and they'll last for 3-4 days. Or, for longer storage, pat them dry and freeze them in an airtight container. Frozen beans will keep for 6 months to a year.

If soaking, cooking & storing beans seems like too much work for you, you'll be glad to know that some health-minded companies are eliminating BPA in their cans. These cans are labeled "BPA-free" or "No BPA." Eden Organics is one reliable producer who uses BPA-free cans for their beans. But even if you have to settle for BPA-lined cans, try not to beat yourself up too much. Many nutritional experts agree that the health benefits of eating more vegetables and fruits outweigh the risks of exposure to pesticides and other toxins.

Nuts & Seeds
Nuts & seeds only need to be soaked for 7-8 hours, following which they should be dehydrated in a warm oven (150˚) for about 12 hours, turning occasionally. They can then be stored in an airtight container in the refrigerator to prevent rancidity.

Chia Coconut Pudding

Omega-3 fats are essential, meaning that our bodies can't synthesize them - we must get them through our diets. They are crucial anti-inflammatory agents and are particularly important during pregnancy, helping with everything from fetal brain development to postpartum mood. Getting sufficient omega-3s can also help prevent menstrual cramps. The easiest way to get omega-3 fatty acids in your diet is through fish, but given concerns about mercury content, fish isn't always the safest choice.

Enter chia seed. Like flaxseed, chia is another food source of omega-3 fatty acids, and it's less apt to go rancid than its seed counterpart. Plus, it's kind of a fun science experiment to cook with: it becomes mucilaginous when wet, kind of like mini tapioca balls. And it's pretty flavorless, so it lends itself to being sprinkled on all sorts of dishes, from cereal grains to smoothies.

I found this chia pudding recipe online and adapted it for ease of use. As you can see from the photo, I get my chia seed from the bulk bins at Whole Foods and store them in a recycled pasta sauce jar in my cupboard. If you're ever in need of an omega-3 boost, this simple pudding should do the trick. It's yummy and easy to make. But beware - it's so rich! I couldn't even finish mine. Enjoy!

Chia Coconut Pudding

1/4 cup chia seeds
1/4 cup dried coconut, shredded & unsweetened
1 cup almond milk (check out my recipe here)
1/8 teaspoon cinnamon
1 T. coconut milk (optional)
Chopped fresh fruit (optional)

Place chia and coconut in a bowl. Heat the milk(s) & cinnamon in a small saucepan until steaming but not boiling. Pour milk over seeds, stir and let sit for 10-15 minutes. Top with fresh fruit if desired & serve.

Hungry for more?

Almond Milk Recipe

Almond Milk Recipe

We in the US are some of the only adults in the world who consume unfermented dairy after the age of 4. Mother's milk is absolutely essential for your growing baby, but cow's milk has become more trouble than it's worth for kids & adults. This article does a fantastic job of describing many of dairy's dangers.

I support the consumption of fermented dairy products like cheese and yogurt, as long as they're made from organic dairy (raw is preferable). And I also understand why people like milk, cream and all its yummy offspring. Personally, if I could stomach it, I would subsist off whipped cream, cheese, and ice cream. Sadly, I can't - nor can anyone else, without serious health risks.

With dairy intolerances & allergies on the rise in the US, it's no wonder that dairy substitutes have popped up everywhere. Soy, rice, coconut and almond milks line the shelves at Whole Foods and beyond. The problem with many of these dairy replacement options is that they are full of sweeteners and other unhealthy additives.

To make a long story short, I've taken to making my own almond milk. It's so yummy over oatmeal, in teas or hot cocoas, or straight out of the bottle. And it's easy to make, to boot. All you need is almonds, water, and dates (vanilla optional). Enjoy!


Easy Almond Milk
1 cup almonds
2 cups filtered water
4 dates (use more or less depending on desired sweetness)
1/2 tsp. vanilla extract

Blend all ingredients on high until almonds are completely pulverized. You could actually drink the mixture at this point if you don't mind the granular texture. Otherwise, use a nut milk bag or doubled cheesecloth to strain the contents of the blender into a reservoir. A rubber band around the mouth of the reservoir helps. (I like to recycle glass peanut butter jars for this purpose). Leave mixture to drain. Squeeze out the pulp. You can save the almond pulp for other treats (try mixing it with coconut, honey and rolling in cocoa for an easy dessert). Refrigerate and enjoy the almond milk within a few days.


Hungry for more? Join our mailing list or work with me!

Super Easy, Super Healthy Summer Gazpacho

Keeping your blood sugar stable and eating a nutrient-rich diet are two important hallmarks of proper prenatal nutrition. But when you're eating for two, it can be a challenge to satisfy your growing appetite without sacrificing quality (or taste). That's why I love, love, love this simple recipe. It's packed with vitamins and minerals (especially if you use organic ingredients) and it couldn't be quicker or easier to make. Plus, perhaps best of all, it's DELICIOUS and you can eat as much of it as you like without feeling guilty. Enjoy!

Simple Gazpacho
4 large heirloom tomatoes
2 cucumbers
1 green bell pepper
1/2 red onion
1 garlic clove

Salt & pepper
2 avocados (opt.)
Olive oil (opt.)

Wash & coarsely chop first 5 ingredients. Add to a food processor and pulse to desired consistency. Season with salt & pepper to taste. Top with chopped avocado and/or a drizzle of olive oil.

Serves 4.